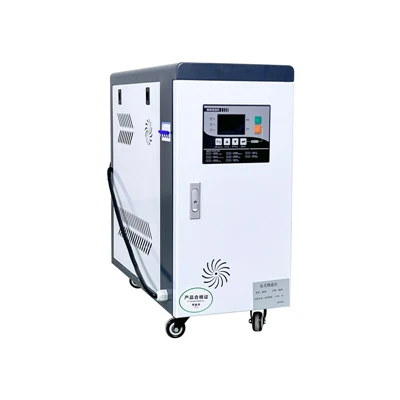
Industrial Air Cooler Hey everyone, it’s Jake here from the screw chiller crew, and I’ve spent the last 8 years helping facility managers, industrial ops teams, and small business owners fix chillers that won’t stop throwing fits. Let’s cut to the chase: your screw chiller’s sensors are lying to you… sometimes. Not on purpose, but if you’re just staring at the dash readings and hitting reset when a fault pops, you’re missing the stuff that stops breakdowns before they shut down your production line or freezer warehouse. This post is the straight talk version of how I actually analyze that sensor data—not some textbook fluff you can’t apply on a Tuesday afternoon when your shift’s about to end. First off, let’s get one thing straight: I don’t care about fancy jargon. I care about real problems: sudden ice buildup on evaporators, sky-high power bills, weird pressure spikes that make your tech call me at 2 a.m. These tips work for every screw chiller sensor, and they’re the exact moves we use when a client’s chiller is acting weird and they need answers fast. Let’s start with the biggest mistake I see most people make: they look at individual sensor readings like they’re single pieces of a puzzle, not the whole scene. I’ve seen a client’s chiller show a “high discharge temp” fault, so they swapped the discharge temp sensor… and the next week, the compressor died. Turned out the water flow sensor was clogged, so refrigerant wasn’t absorbing heat, making the discharge temp rise, which the sensor caught. But because they only fixed the sensor, not the root cause, the compressor burned out. Moral of that story: never trust one sensor. Always cross-reference at least 2-3 related ones. Here’s how we break that down step by step, no acronym overload (but if I use one, I’ll explain it like I’m talking to a buddy who knows chillers a little). First, let’s list the main sensors your screw chiller’s got because you can’t analyze data if you don’t know what you’re looking at: 1. Suction and discharge pressure sensors (they measure the pressure going into and out of the compressor—think of this like your car’s oil pressure, but for refrigerant). 2. Suction and discharge temp sensors (the temps at those same pressure points). 3. Entering and leaving water temp sensors (the water going into your chiller from the building and going back out to cool it—super important for HVAC chillers). 4. Oil pressure and oil temp sensors (screw chillers use oil to lubricate the rotors, so this is make-or-break for the compressor). 5. Current sensor (measures how much power the compressor’s pulling—this tells you if it’s working too hard). Now, step one: pull the baseline data first. If your chiller’s been running for a month with no issues, write down what the sensors read at the exact load it’s running at. Let’s say a food processing plant runs their chiller at 75% load 24/7—their baseline would be suction pressure at 85 psi, discharge at 210 psi, leaving water at 45°F. If next week, suction pressure drops to 72 psi at the same 75% load, that’s a red flag. No, it’s not a “sensor error” until you check it against something else. Now, step two: check for sensor drift first, before blaming the whole chiller. This is the #1 thing I troubleshoot in the first 10 minutes of a call. Sensors don’t just go bad suddenly—they drift over time, usually because of dirt, vibration, or just age. How do you test that? Grab two identical sensors (or a portable pressure/temp meter that we carry, since we’re chillers guys) and tap it next to the installed sensor. If the installed suction pressure sensor says 85 psi and the portable says 79 psi? That drift’s got to go, and fast. I had a bakery client once whose chiller was blowing warm bread cooling air, and they were blaming the compressor. We checked their leaving water sensor—it read 50°F, but the portable said 42°F. Turned out the sensor was coated in dust from flour, so it was reading way higher than actual. Swapped the sensor, problem fixed, no compressor replacement needed. Sensor drift is easy to mix up with actual chiller issues, so always rule that out first—don’t waste time pulling the compressor apart over a bad $50 sensor. Step three: cross-reference pressure and temp pairs, because screw chillers run on refrigerant pressure-temp curves, that’s non-negotiable. Refrigerants (we use R-134a most now, but R-410A too) have a fixed rule: for any given pressure, there’s only one saturation temp (that’s the temp where the refrigerant turns from liquid to gas, or vice versa). So here’s the math, no calculator app needed. If the suction pressure sensor says 80 psi for R-134a, the saturation temp should be around 40°F. If your suction temp sensor reads 48°F? That’s a sign you’ve got “superheat” issues, which means the refrigerant line has too much gas and not enough liquid, or there’s air in the system. I’ve seen this cause a chiller to use 20% more power than normal, because it’s working extra hard to cool the building. Conversely, if discharge pressure is 200 psi, saturation temp should be around 105°F. If your discharge temp is 115°F? That means the compressor is working too hard, usually because of dirty condenser coils or low refrigerant charge. This is way more reliable than just staring at the discharge temp reading alone, because it ties two sensors together. Step four: watch for trends, not one-off spikes. Sensor faults aren’t just random 1-minute blips—those are usually just electrical glitches. A real problem is when a sensor stays off for 3 hours straight, or trends in a weird direction over a week. For example, I had a pharmaceutical client who kept getting “low suction pressure” alarms. First, we checked the sensor, it was fine. Then we looked at the trend over a month: suction pressure was dropping 5 psi every week. That meant refrigerant was slowly leaking out, not a clog or flow issue. If we’d just fixed the alarm when it popped, we would’ve missed the leak, and eventually the chiller would’ve had no refrigerant, destroying the compressor. Another trend thing: power draw. The current sensor on the compressor—if it’s spiking by 10% during the same load, that’s not normal. Last year, a manufacturing plant’s chiller current slowly went up over a month, and we found the evaporator tubes were scaled with mineral buildup from their water supply. The chiller was working harder to cool the water, so power draw went up, and eventually the tubes were so blocked the chiller couldn’t keep up. By catching the trend in current and cross-referencing it with the leaving water temp (which was slowly rising too), we flushed the tubes and saved them $15k in compressor replacement. Step five: don’t ignore the weird small sensors, like oil pressure and oil temp. Screw chillers rely on oil to seal the rotors and keep them from grinding together, so oil sensor data is like the chiller’s vital signs. If oil pressure drops while the compressor is running at full load, that’s not a “minor alert”—that means the oil pump’s failing, or the oil filter’s clogged. I had a client who thought their oil sensor was lying because the temp was 10°F higher than normal, until we checked the oil filter and it was completely caked with metal shavings from worn rotors. If we’d waited for the compressor to lock up, they would’ve had a $50k repair instead of a $200 filter change. Now, let’s talk about the mistakes I see people make all the time, because even if you know the steps, you’ll slip up here. First: ignoring water flow. The entering and leaving water sensors don’t just measure temp—if the difference between entering and leaving water is less than 5°F, that means there’s not enough water flow through the chiller. Too much and it can cause water hammer, but too little means your chiller is overheating. I had a grocery store once where their leaving water temp was normal, but the delta (difference) was only 2°F. Turned out the water pump was dying, so not enough water was moving through the evaporator. If we’d only fixed the temp sensor, we would’ve missed that, and the chiller would’ve seized. Second: assuming all sensors are calibrated the same. Even two suction pressure sensors from the same brand can read 3 psi different if they’re installed wrong or exposed to different temps. Always cross-check with the portable meter, like I said before, because no installed sensor is perfect forever. Third: forgetting to account for ambient conditions. If it’s 95°F outside, your condenser pressure will naturally be higher than when it’s 70°F. If you don’t note the ambient temp, you’ll think the chiller is broken when it’s just the weather. Our baseline data should also include ambient temp, so you can adjust for that. Now, here’s what we do when a client sends us sensor data and they’re stuck—we don’t give them a textbook answer, we give them a fix. For example, if a client sends us: Suction pressure: 75 psi, suction temp: 45°F, discharge pressure: 195 psi, discharge temp: 110°F, leaving water: 48°F, current draw: 12% higher than baseline. First step: check if suction pressure matches the saturation temp for R-134a. 75 psi should be ~35°F, but suction temp is 45°F—that’s superheat. So either the refrigerant has air, or the expansion valve is stuck open. Then, current draw is high, which matches the discharge pressure being a little high (195 psi should be ~100°F, it’s 110°F, so compressor is working hard). So the root cause is probably dirty condenser coils or a refrigerant charge issue. From there, we tell them to clean the condenser first, then check the refrigerant charge. No need to pull the compressor apart, no need to replace sensors. That’s the stuff we live for. Now, let’s wrap this up because I know you’re busy—these are the 5 quick checks you can do today without calling a tech: 1. Pull last week’s baseline data for your chiller at its most common load. 2. Grab your portable pressure/temp meter, check 2 sensors at random to rule out drift. 3. For each pressure, calculate the expected saturation temp for your refrigerant (Google has a quick chart, no need to memorize it) and compare to the actual temp reading. 4. Check if the leaving water delta is between 5-8°F—if it’s lower, check water flow; if higher, check for a refrigerant leak. 5. Look at the trend of current draw and discharge temp over the last 3 days—if they’re slowly going up, that’s a problem, not a blip. And a quick note for our regular folks: if you’re running a chiller that’s 10+ years old, those sensors are going to drift more, so calibrate them every 6 months, not once a year. We’ve got a cheap portable calibration tool we recommend, it saves so much hassle. At the end of the day, analyzing screw chiller sensor data isn’t about being an engineer—it’s about connecting the dots. It’s about realizing that a weird pressure reading and a slightly higher current draw aren’t separate issues, they’re two parts of the same problem. I’ve seen too many companies waste money on unnecessary parts and repairs because they only look at one sensor, or ignore trends, or blame the sensor first before checking the actual chiller. If you’re staring at your sensor data and not sure what it means, or you’ve got a chiller that’s throwing fault codes and you can’t figure out why, reach out to our team. We work with all types of industrial, commercial, and even small-scale chillers, and we can help you parse that data, figure out the root cause, and fix it before it becomes a big, expensive problem. Don’t wait for a 2 a.m. call that costs you thousands—address those sensor trends now. Thanks for reading, drop a note in the comments if you’ve got a chiller sensor story (good or bad), we love hearing from you.
References: Stoecker, W. F., & Jones, J. W. (1982). Refrigeration and Air Conditioning. McGraw-Hill; ASHRAE. (2021). ASHRAE Handbook: HVAC Systems and Equipment. American Society of Heating, Refrigerating and Air-Conditioning Engineers; Dossat, R. J. (1997). Principles of Refrigeration. Prentice Hall. Screw Chillers
Kunshan Aotianxin Machinery Co., Ltd.
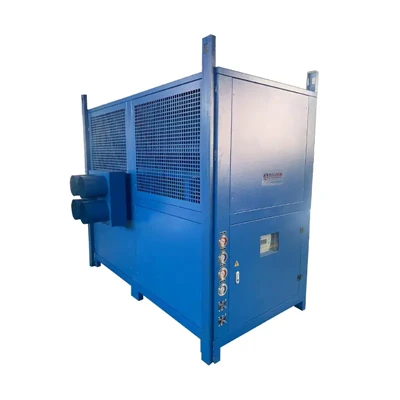
We’re well-known as one of the most reliable screw chillers manufacturers in China. With abundant experience, our factory offer high quality screw chillers made in China with low price. If you have any enquiry about quotation and free sample, please feel free to email us.
Address: 550 Shengguang Road, Bacheng Town, Kunshan City, Jiangsu Province
E-mail: 1516722561@qq.com
WebSite: https://www.atxks.com/
